Implementation and complete understanding of BLE(Bluetooth low energy)
Controlling the turtle was fun. Who knew that one day I will be creating mobile applications that are going to control real things like robots via Bluetooth LE. In this blog I will go through all the challenges I have faced to implement BLE(Bluetooth low energy) and also everything you need to know to successfully implement BLE in Xamarin forms. This blog will be beneficial even for the beginners who is going to start there research in developing a Xamarin application with Bluetooth technology. I will help you to understand BLE and develop a Xamarin application with BLE feature from scratch.
Bluetooth Technology
Bluetooth is a wireless technology standard used for exchanging data between a Bluetooth server and mobile devices over short distances. We are using Bluetooth in Xamarin forms to connect to a Bluetooth device and also to send and receive data.
So there is two ways to implement Bluetooth in Xamarin forms.
- Bluetooth Classic
- Bluetooth Low Energy
I tried to do both but went ahead with Bluetooth low energy.
Why I went ahead with Bluetooth Low Energy?
The main problem is you need to have MFi enabled Bluetooth classic devices. As you can see in this. Also there is less resources where you will find full implementation of Bluetooth classic compared to Bluetooth low energy according to my opinion.
Understanding BLE
Bluetooth Low Energy (BLE) is a low power wireless communication technology that can be used over a short distance to enable smart devices to communicate. Some of the devices you interact with every day such as your smart phone, smart watch, fitness tracker, wireless headphones and computer are using BLE to create a seamless experience between your devices.
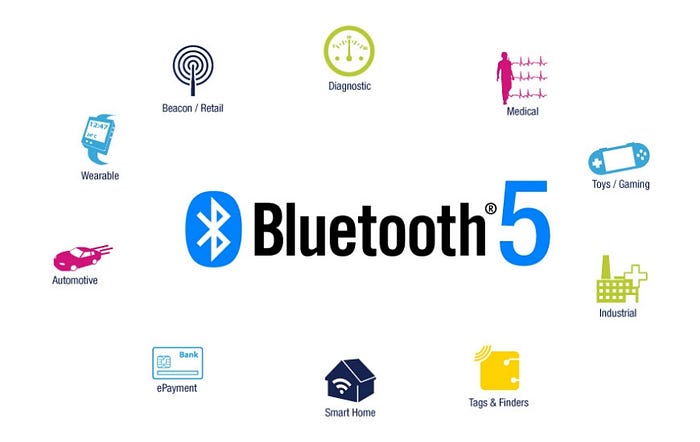
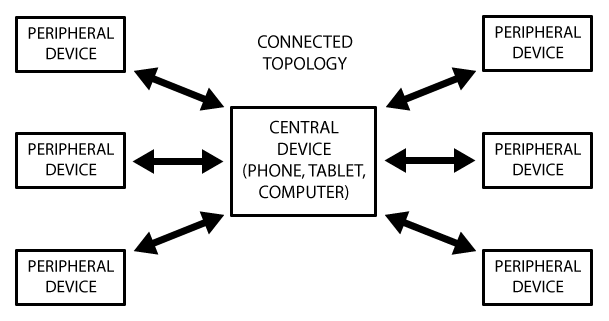
In order to understand how BLE works, we need to define some of the terms and concepts at play. A BLE device is acting in either a central or peripheral role and is sometimes also referred to as a client or server.
Central (Client)
- A device that initiates commands and requests, and accepts responses.
- Examples: computer, smartphone.
Peripheral (Server)
- A device that receives commands and requests, and returns responses
- Examples: a temperature sensor, heart rate monitor.
The peripheral role is what we often think of with regards to BLE devices — things like headphones, fitness trackers, heart rate monitors, etc. A device that advertises its availability for connection and provides an interface for communication is acting as a peripheral. In my project there was a Seco board which was acting as a peripheral. We had a Bluetooth adapter attached to the unit which did the advertising so make sure the adapter has the advertising feature. So there should be one Native Android developer working on the peripheral side.
Understanding peripheral-
Please make sure you get a good Bluetooth adapter from a trustable company which can give you support. The code for advertiser is here https://github.com/googlearchive/android-BluetoothAdvertisements .
And also note there would be lots of dependency between client side and peripheral side. If there is anything missing or wrong in peripheral code it will also affect the client application. For test purpose you can even create an advertiser in nRF connect app for free.
Your advertiser will look like this in nRF app.
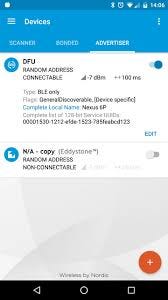
While creating an advertiser you need to make sure you add the GATT services and characteristics with read, write and notification GATT operations.
What is GATT ?
GATT is an acronym for the Generic Attribute Profile, and it defines the way that two Bluetooth Low Energy devices transfer data back and forth using concepts called Services and Characteristics
Understanding BLE client side application-
For test purpose you can download a BLE scanner from play store for Android and for iOS you can download light blue app. You can check if your peripheral device is getting discovered and connecting. You can take only BLE devices as peripheral(client) so mostly your headphones and speakers will not be getting discovered. I have used another phone as peripheral in which I have downloaded nRF app and created an Advertiser or else you can even use MI band.
Your BLE scanner or Light blue app once connected will look like this.
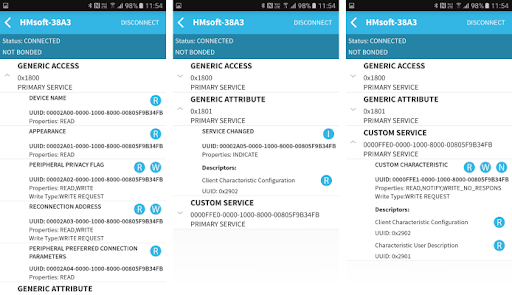
So as you can see in this image once you are connected to BLE peripheral you will be able to access the GATT service and characteristics. You need to make sure you also add read, write and notification operation for your custom GATT characteristics in peripheral if you want to do read, write or notification operation in client. You will be able to access the service and characteristics of the advertiser through its UUID. So UUID of GATT service is 0000FFE0–0000…. and UUID of GATT characteristic is 0000FFE1–0000…
How to create a BLE client xamarin forms application?
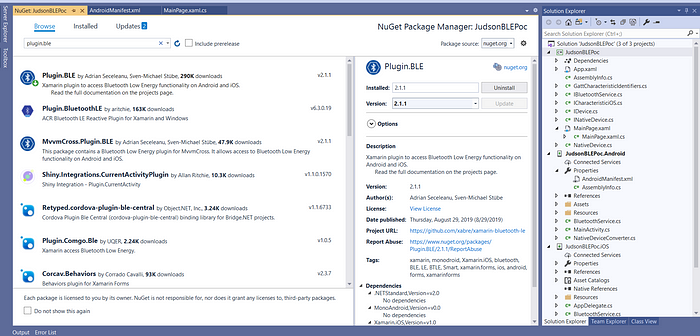
First of all create a xamarin forms project. And add latest Plugin.BLE in your project. I have used latest working Plugin.BLE version 2.1.1 in my project. As you can see in this image
Add these permissions to AndroidManifest.xml. Don’t forget to prompt the user for the location permission.
<uses-permission android:name="android.permission.ACCESS_COARSE_LOCATION" /><uses-permission android:name="android.permission.ACCESS_FINE_LOCATION" /><uses-permission android:name="android.permission.BLUETOOTH" /><uses-permission android:name="android.permission.BLUETOOTH_ADMIN" /><uses-permission android:name="android.permission.ACCESS_WIFI_STATE" /><uses-permission android:name="android.permission.ACCESS_NETWORK_STATE" /><uses-permission android:name="android.permission.INTERNET" />
Add this line to your manifest if you want to declare that your app is available to BLE-capable devices only:
<uses-feature android:name="android.hardware.bluetooth_le" android:required="true"/>iOS
On iOS you must add the following keys to your Info.plist
<key>UIBackgroundModes</key><array><string>bluetooth-central</string></array><key>NSBluetoothPeripheralUsageDescription</key><string>YOUR CUSTOM MESSAGE</string><key>NSBluetoothAlwaysUsageDescription</key><string>YOUR CUSTOM MESSAGE</string><key>NSLocationAlwaysAndWhenInUseUsageDescription</key><string>YOUR CUSTOM MESSAGE</string><key>NSLocationAlwaysUsageDescription</key><string>YOUR CUSTOM MESSAGE</string><key>NSLocationWhenInUseUsageDescription</key><string>YOUR CUSTOM MESSAGE</string>
With this app, it’s possible to
- Check the ble status
- Discover devices
- Connect/Disconnect
- Discover the services
- Discover the characteristics
- See characteristic details
- Read/Write and Register for notifications of a characteristic
Get the bluetooth status
var state = ble.State;You can also listen for State changes. So you can react if the user turns on/off bluetooth on you smartphone.
ble.StateChanged += (s, e) =>
{
    Debug.WriteLine($"The bluetooth state changed to {e.NewState}");
};
IAdapter
Scan for devices
adapter.DeviceDiscovered += (s,a) => deviceList.Add(a.Device);
await adapter.StartScanningForDevicesAsync();
ScanTimeout
Set adapter.ScanTimeout to specify the maximum duration of the scan.
ScanMode
Set adapter.ScanMode to specify scan mode. It must be set before calling StartScanningForDevicesAsync(). Changing it while scanning, will not affect the current scan.
Connect to device
ConnectToDeviceAsync returns a Task that finishes if the device has been connected successful. Otherwise a DeviceConnectionException gets thrown.
try
{
    await _adapter.ConnectToDeviceAsync(device);
}
catch(DeviceConnectionException e)
{
    // ... could not connect to device
}
Connect to known Device
ConnectToKnownDeviceAsync can connect to a device with a given GUID. This means that if the device GUID is known, no scan is necessary to connect to a device. This can be very useful for a fast background reconnect. Always use a cancellation token with this method.
- On iOS it will attempt to connect indefinitely, even if out of range, so the only way to cancel it is with the token.
- On Android this will throw a GATT ERROR in a couple of seconds if the device is out of range.
try
{
    await _adapter.ConnectToKnownDeviceAsync(guid, cancellationToken);
}
catch(DeviceConnectionException e)
{
    // ... could not connect to device
}
Get services
var services = await connectedDevice.GetServicesAsync();or get a specific service:
var service = await connectedDevice.GetServiceAsync(Guid.Parse("ffe0ecd2-3d16-4f8d-90de-e89e7fc396a5"));Get characteristics
var characteristics = await service.GetCharacteristicsAsync();or get a specific characteristic:
var characteristic = await service.GetCharacteristicAsync(Guid.Parse("d8de624e-140f-4a22-8594-e2216b84a5f2"));Read characteristic
var bytes = await characteristic.ReadAsync();Write characteristic
await characteristic.WriteAsync(bytes);Characteristic notifications
characteristic.ValueUpdated += (o, args) =>
{
    var bytes = args.Characteristic.Value;
};await characteristic.StartUpdatesAsync();
If you need to see the sample project you can look into this example https://www.jenx.si/2019/08/16/bluetooth-gatt-xamarin-forms-client/ and also this https://www.jenx.si/2020/08/13/bluetooth-low-energy-uart-service-with-xamarin-forms/ . So this is how you can successfully create a BLE xamarin forms application. Happy coding😎👌
